How to automate meeting prep with Lindy AI Agents
The Rundown: 
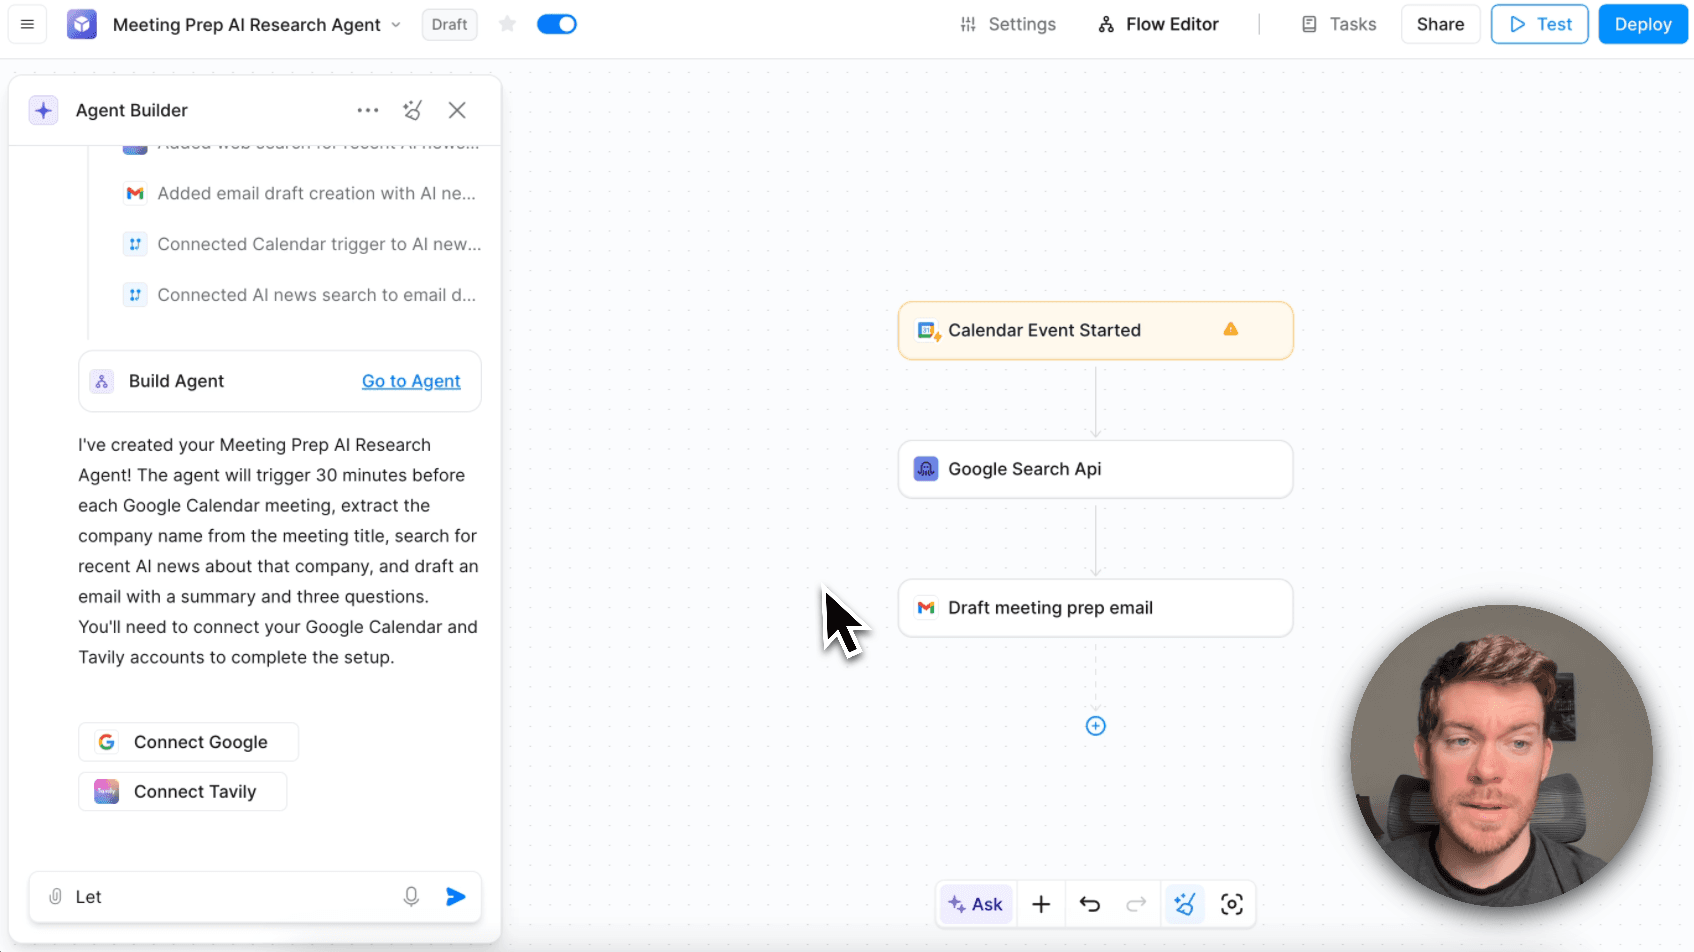
Lindy new agent builder lets you create an AI agent that automatically researches companies 30 minutes before your meetings and drafts email summaries by simply describing it.
🧰 Who is this useful for:
- Sales professionals preparing for client meetings
- Business development teams managing multiple prospects
- Executives wanting to stay informed about meeting attendees
- Anyone who wants to walk into meetings fully prepared
STEP 1: Access the Agent Builder
Head over to Lindy AI and you'll see the main dashboard with agent creation options. In the text field that says "Build an agent or perform a task," describe exactly what you want your agent to do.

For this tutorial, type:
"Build an agent that 30 minutes prior to each Google Calendar meeting is going to look for the company that I'm meeting with, research the latest AI news on the internet and then draft me an email with a summary and three questions that I can ask them."
STEP 2: Configure Your Agent Settings
The system will ask clarifying questions to customize your agent. You'll typically see options like:
- Company identification: Choose "Extract the company name from the calendar event title" to automatically detect which company you're meeting with
- Email destination: Select "Gmail draft" to have the research summary automatically saved as a draft
- Research scope: Confirm you want recent AI news and company-specific information
Answer these prompts to fine-tune how your agent operates.

STEP 3: Customize Your Workflow
Once the agent builder creates your workflow, you'll see a visual representation with connected nodes: Calendar Event Started → Google Search API → Draft Email. You can modify any of these components by clicking on them.
If needed, replace default integrations with your preferred tools (like switching from one search API to another). The system will show you available alternatives when you click "Replace" on any node.

STEP 4: Test and Deploy Your Agent
Before going live, use the "Test" button to run a sample meeting scenario. The system will show you exactly how the agent identifies your meeting, researches the company, and drafts the email summary.
Review the generated email to ensure it includes the company research, recent news, and suggested conversation questions. Once satisfied, click "Deploy" or "Turn On" to activate your agent for all future calendar events.
Pro tip: Start with a simple agent configuration and gradually add more features. You can always edit your agent later to include additional research sources or modify the email template format.
